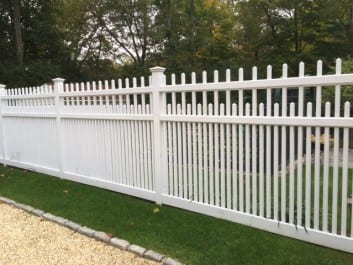
 Do you dream of owning a home with a white picket fence? That dream can become reality, whether you install the fence yourself or have a professional do it for you. Truly, a picket fence is a great option if you seek a sophisticated, charming look to your home. And like other fences, it adds security and curb appeal, which in turn adds value to your home.
Installing a fence isn’t easy. But if you choose to take on such a project independently, below are the guidelines you should follow. But first, here are the items you need:
- Fencing
- Fencing posts
- 2 ½ in Galvanized screws
- Level
- Gibbs posthole digger
- Mason’s line
- 7 ft tampering bar
- Shovel
- 7 ft digging bar
- Drill or screwdriver
- Circular saw
- Tarp
- Tape measure
Once you have all the materials, you can begin installation. The procedure goes as follows:
- After you have located and marked buried utility wires, dig a 10 in. diameter hole as deep as possible with a shovel. Then, use the Gibbs digger to bring the hole to 32 in. deep. Use the digging bar to get any rocks or roots out of the way. Use the tarp for removed soil.
- Put the post in the hole. Add 8 in. of soil and check to see if it’s plumb with the level on two adjacent sides. When it’s plumb, use the tamper to pack down the soil. Repeat this step until the hole is filled.
- Tack the mason’s line 5 in. above the ground and measure from the post to where the fences first corner is going to be. Hit a stake in that spot and wrap the line around it, keeping it 5 in. above the ground and pulling it tight.
- From the post, measure the length of the first panel and place a screw to mark it. Dig a 10 in. diameter hole at the marked spot. Offset it enough so the post’s face will touch the line.
- Place the panels in the mortises, then place wood wedges at the other end of the panel and adjust it till the top is level. Make sure the rails are 2-5 in. above the ground, then screw the rails in the post.
- Place the next post in the hole so that its front face touches the mason’s line. If the post is mortised, adjust the height, then put the rails into the mortises and fill the hole like you did in Step 2. Secure with 2 ½ in. screws.
- Repeat each Step until the fence is complete.
Installing a fence on your own can be difficult and stressful, but possible. If you have any questions or would like a professional to install your fence, give us a call at Riverside Fence! We are happy to assist you in anyway we can!

